
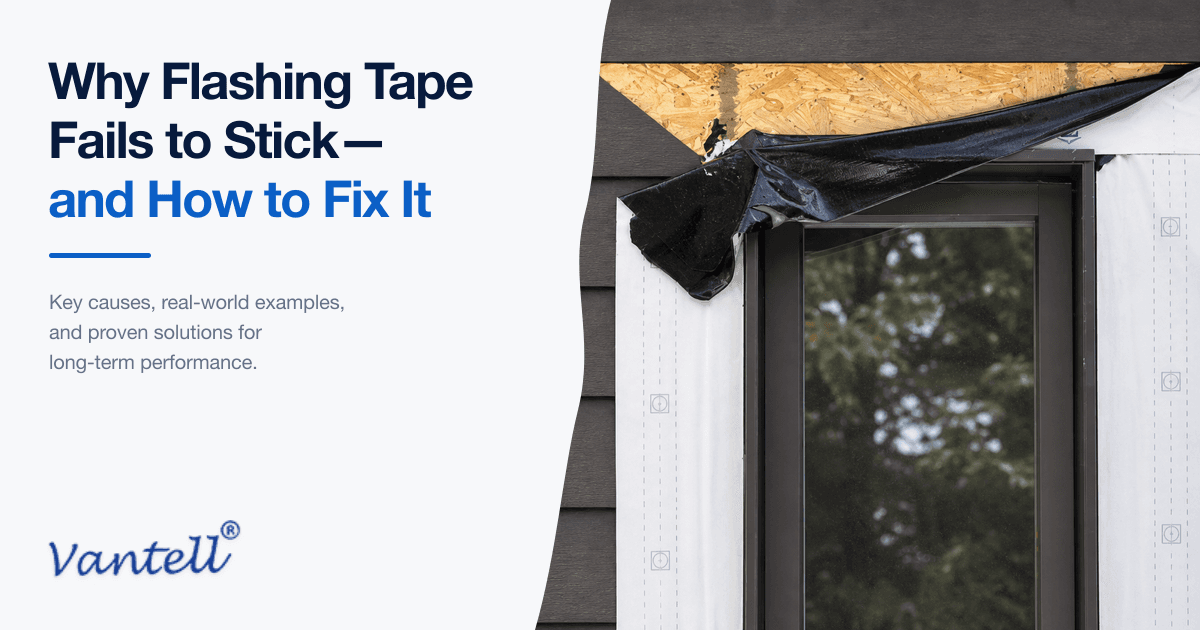
Flashing Tape Adhesion Is a System Problem
When flashing tape lifts from OSB, plywood, exterior gypsum sheathing, concrete or metal, the tape is often blamed immediately. Sometimes the product is responsible. In many other cases, however, the failure develops because the adhesive, substrate, environmental conditions and installation method were not compatible with one another.
A flashing tape may bond well to clean plywood at moderate temperatures but perform very differently on dusty OSB, damp gypsum sheathing, cold concrete or an oily metal frame. It may also appear secure during installation and begin lifting several hours later because the adhesive never achieved sufficient contact with the actual substrate.
This is why flashing tape installation should be treated as a controlled bonding process rather than a simple peel-and-stick operation.
This guide explains how pressure-sensitive flashing tapes develop adhesion, how to identify the actual failure mode, when primer is useful, how different substrates should be prepared and how a practical field adhesion test can reduce jobsite risk.
Why Pressure-Sensitive Flashing Tape Does Not Bond Instantly
Most self-adhered flashing tapes use a pressure-sensitive adhesive. Unlike a liquid sealant, a pressure-sensitive adhesive does not normally depend on a chemical curing reaction after application. It develops adhesion by conforming to the microscopic texture of the substrate and creating close physical contact over the largest possible area.
This process is commonly called adhesive wet-out.
Good wet-out depends on several conditions:
- the adhesive must contact the real substrate rather than dust or contamination;
- the substrate surface must be stable enough to support the bond;
- the adhesive must be sufficiently conformable at the installation temperature;
- the tape construction must suit the surface roughness and intended detail;
- firm, uniform pressure must be applied after placement;
- the tape must not be stretched, bridged or loaded before the bond develops;
- moisture, condensation, frost and incompatible chemicals must be controlled.
If wet-out is poor, the adhesive may touch only the highest points of a rough substrate. The tape can feel lightly attached while the actual bonded area remains much smaller than it appears from the outside.
First Determine What Actually Failed
Before choosing a repair method, inspect both the removed tape and the exposed substrate. The failure surface often reveals whether the problem occurred at the adhesive interface, within the adhesive, within the substrate or within the tape construction.
| Failure Mode | What It Looks Like | Possible Causes |
|---|---|---|
| Adhesive failure | The tape separates relatively cleanly and most of the adhesive remains on the tape. | Dust, moisture, low surface temperature, insufficient pressure, incompatible coating, low-surface-energy material, missing primer or inadequate dwell time. |
| Cohesive failure | The adhesive splits internally and residue remains on both the tape and substrate. | Excessive heat, movement, stored tension, sustained loading, adhesive softening or insufficient internal adhesive strength. |
| Substrate failure | Wood fibres, gypsum facer, paint, cement dust or another surface layer is removed with the tape. | Weak, weathered, chalky, delaminated or poorly bonded substrate surface. |
| Backing or laminate failure | The adhesive remains attached, but the tape backing tears, stretches or separates from another layer. | Overstretching, excessive movement, chemical incompatibility, heat damage, roll damage or unsuitable tape construction. |
| Product or batch irregularity | Bonding is inconsistent across the tape width, between rolls or between areas installed under the same controlled conditions. | Uneven adhesive coating, local adhesive voids, liner contamination, storage damage, adhesive-to-backing delamination or batch variation. |
Adhesive Failure
In an adhesive failure, separation occurs between the adhesive and the substrate. This does not automatically prove that the adhesive is defective. The adhesive may have been prevented from reaching the substrate by dust, water, oil or another weak intermediate layer.
Typical indicators include:
- a relatively clean substrate after peeling;
- low and uneven peel resistance;
- weaker adhesion at cold, dusty or shaded areas;
- significant improvement after cleaning, warming or priming;
- edge lifting without visible damage to the substrate.
Cohesive Failure
Cohesive failure means the adhesive bonded to the substrate but split internally. This may occur when a soft adhesive is exposed to excessive heat, sustained stress, movement or stored tension.
A cohesive failure should not be treated in the same way as a contaminated-surface failure. Simply using more primer may increase the bond to the substrate without solving the weakness inside the adhesive layer.
Substrate Failure
When the tape removes fibres, paint, facer material or a powdery cement layer, the outer substrate surface may be weaker than the adhesive bond.
A more aggressive tape will not necessarily solve this condition. The unstable surface must first be removed, repaired, replaced or consolidated with a compatible primer.
Backing or Laminate Failure
If the adhesive remains attached but the tape backing tears or separates, examine whether the product was stretched, forced into an unsuitable three-dimensional detail, exposed to incompatible chemicals or subjected to movement beyond its intended capability.
Product-Related Causes Must Also Be Ruled Out
A balanced failure investigation should not assume that every adhesion problem is caused by the installer or substrate. Product construction, manufacturing consistency, storage and transportation can also affect performance.
Possible product-related causes include:
- insufficient or uneven adhesive coating weight;
- local areas with missing adhesive or poor coating coverage;
- contamination transferred from the release liner;
- adhesive ageing caused by excessive storage time or temperature;
- crushed, telescoped or damaged rolls;
- adhesive-to-backing delamination;
- inconsistent release-liner removal;
- incorrect tape construction for the substrate or exposure condition;
- variation between production lots.
When product inconsistency is suspected, compare:
- multiple strips from different positions within the same roll;
- multiple rolls from the same production batch;
- a roll from another batch;
- the installed product against a retained reference sample;
- controlled laboratory peel results against field observations;
- storage and transportation records against the recommended conditions.
A manufacturer should be able to review relevant batch information, coating consistency, retained samples and internal quality-control records. Vantell uses internal peel, tensile, ageing and substrate-compatibility checks as part of product development and quality review. More information is available in the article on the Vantell internal testing laboratory.
The Six Most Common Causes of Poor Adhesion
1. Dust and Surface Contamination
Dust is one of the most common causes of flashing tape failure because it forms a weak intermediate layer. The adhesive may appear to be attached, but it is actually bonded to loose particles instead of the structural surface beneath them.
Typical contaminants include:
- OSB and plywood sawdust;
- gypsum dust and loose glass fibres;
- cement and masonry dust;
- form-release oil and curing compounds;
- fabrication oil on metal;
- silicone, wax, overspray or sealant residue;
- oxidation and loose corrosion products;
- cleaner or detergent residue;
- dirt transferred from gloves or tools.
Wiping the surface once with a glove is rarely sufficient. Fine dust can remain trapped in wood strands, pores, facer texture and concrete irregularities.
Recommended Cleaning Process
- Remove large debris with a clean brush or vacuum.
- Remove loose fibres, unstable coatings and surface deposits.
- Wipe the bonding area with a clean, dry and lint-free cloth.
- Repeat until the cloth no longer collects visible contamination.
- On non-porous surfaces, use a compatible cleaner when permitted.
- Allow all cleaner and moisture to evaporate before applying tape.
Compressed air should be used cautiously. It may redistribute dust, introduce compressor oil or blow debris into adjacent joints.
2. Moisture, Condensation, Frost and Saturation
Not all moisture conditions are equivalent. The substrate may contain:
- standing water, such as visible droplets or a water film;
- absorbed moisture inside wood, gypsum or concrete;
- condensation caused by a surface temperature below the dew point;
- frost or ice that completely separates the adhesive from the surface.
Some tapes may tolerate slightly damp conditions, but this does not mean they should be installed over standing water, frost, ice or saturated sheathing. The adhesive still requires direct physical contact with the substrate.
A tape installed over wet wood or concrete may initially appear secure. As the material dries, moisture can migrate toward the tape interface and cause:
- blistering;
- edge lifting;
- loss of adhesion;
- softening of paper or coated facers;
- trapped moisture around the opening;
- reduced drying potential.
Before installation, remove standing water, snow, frost and ice. Check horizontal sills, shaded elevations and metal surfaces carefully. Water-damaged or delaminated gypsum sheathing should be replaced rather than covered with tape.
3. Low Substrate Temperature
Pressure-sensitive adhesives normally become firmer as temperature decreases. When the adhesive is too cold, it cannot conform effectively to the substrate texture.
Low-temperature failures commonly occur when:
- tape rolls are stored overnight in an unheated vehicle;
- the substrate remains colder than the surrounding air;
- installation begins early in the morning;
- the wall is shaded or exposed to overnight cooling;
- metal frames retain cold;
- condensation forms on a cold surface;
- the tape is installed without firm rolling pressure.
Application temperature and service temperature are different values. A tape may withstand very low temperatures after the bond has developed but still require a warmer substrate during installation.
A product rated for cold-climate service is not automatically approved for installation over a frozen or condensing surface.
Cold-Weather Practices
- Store tape rolls in a conditioned environment before use.
- Bring only the required quantity to the work area.
- Measure the substrate temperature, not only the air temperature.
- Remove condensation, frost and ice completely.
- Use a product approved for the intended application temperature.
- Use primer where required.
- Apply immediate and uniform roller pressure.
- Perform a field adhesion test under actual conditions.
4. Insufficient Application Pressure
Pressure-sensitive adhesive requires pressure. Hand smoothing alone is inconsistent, especially on rough, porous or irregular substrates.
A pressure roller helps:
- increase the actual contact area;
- force the adhesive into surface texture;
- remove trapped air;
- improve edge contact;
- reduce local bridging;
- improve conformity around transitions.
The roller does not chemically activate the adhesive. It improves physical contact between the adhesive and the substrate.
Correct Rolling Technique
- Roll immediately after placing the tape.
- Use firm and uniform pressure.
- Roll from the center toward the edges.
- Cover the complete width and length of the tape.
- Make additional passes over edges, laps and corners.
- Use a narrow roller for complex details.
- Inspect for wrinkles, fish-mouths and unbonded bridges.
5. Stretching and Stored Tension
Stretching a non-elastic flashing tape creates stored tension. The tape may remain in position temporarily and then attempt to recover its original shape.
This can cause:
- edge lifting;
- corner pullback;
- wrinkling;
- stress at overlaps;
- failure at window sill-to-jamb transitions.
Standard flashing tape should normally be laid onto the substrate without tension. Three-dimensional corners should be formed with a tape designed for stretching, a compatible liquid flashing or a preformed corner component.
6. Bridging and Hidden Voids
Bridging occurs when tape spans a gap, inside corner or uneven surface without contacting the area underneath.
The outer surface may appear smooth, but an unbonded void remains below. Bridging is common at:
- sheathing joints;
- frame-to-wall transitions;
- inside corners;
- changes in substrate thickness;
- rough concrete edges;
- fasteners and protrusions.
A bridged section can puncture, tear or allow water to move laterally beneath the flashing. The substrate should be made reasonably flush before taping, and the tape should be pressed into corners rather than stretched across them.
Substrate Compatibility Matrix
Different substrates present different adhesion risks. The following matrix summarizes the most important differences without assuming that every material within a category behaves identically.
| Substrate | Primary Risks | Recommended Preparation | When Primer May Be Needed |
|---|---|---|---|
| OSB | Rough texture, loose strands, sawdust, resin-rich areas, wax, swollen edges and weathered fibres. | Vacuum or brush thoroughly, remove loose strands, dry swollen edges and roll firmly in multiple directions. | Weathered, dusty, cold or highly textured OSB; areas that fail an unprimed field test. |
| Plywood | Wood dust, splinters, preservatives, treatments, coatings, wet veneers and uneven grain. | Remove cutting dust and splinters, verify surface treatments, dry the panel and roll across the grain texture. | Weathered, treated, highly porous or factory-coated plywood where compatibility is uncertain. |
| Exterior gypsum sheathing | Chalky facer, loose glass fibres, low surface strength, water damage and facer delamination. | Use a soft brush or vacuum, avoid aggressive abrasion, replace damaged board and use controlled roller pressure. | Dusty or variable facers, critical transitions and surfaces where an approved primer can bind loose particles. |
| Concrete and masonry | Laitance, cement dust, porosity, form oil, curing compounds, efflorescence, alkalinity and residual moisture. | Remove unstable surface material, oil and curing residue; identify moisture sources and allow adequate drying. | Porous, dusty or irregular concrete and masonry, particularly at critical transitions. |
| Metal | Fabrication oil, fingerprints, oxidation, protective-film residue, paint, powder coating and low-surface-energy finishes. | Clean with an approved residue-free method, allow complete evaporation and remove loose corrosion. | Painted, powder-coated or otherwise treated surfaces that show poor initial compatibility. |
OSB: Adhesive Mass and Conformability Matter
OSB is challenging because the adhesive may contact only the highest wood strands. Low areas can remain unbonded, leaving pathways for air or water beneath the tape.
If fibres remain on the adhesive after peeling, this does not always prove that the installation is acceptable. It may indicate that the outer OSB surface failed before the tape reached the required bond strength.
On rough OSB, tape conformability and adhesive coating weight can be as important as nominal peel adhesion. A thin adhesive layer that performs well on smooth metal may not fill the deeper texture of rough wood-based sheathing.
Exterior Gypsum: The Facer May Be the Limiting Layer
On exterior gypsum sheathing, the adhesive may bond successfully to the facer while the facer itself separates from the board. Primer can help bind minor loose particles, but it cannot restore a structurally damaged or delaminated facer.
Aggressive cleaning or rolling should also be avoided because it can damage the surface that the tape is intended to bond to.
Concrete: Tape Is Not Always the Correct Solution
Very rough, damp or unstable concrete may not provide a reliable direct tape substrate. In some details, a liquid flashing, compatible sealant transition or mechanically supported membrane may provide better continuity than forcing a tape onto a highly irregular surface.
Metal: Smooth Does Not Mean Clean
Metal can provide high potential adhesion, but even a thin layer of fabrication oil, silicone or cleaner residue can drastically reduce performance.
On painted or powder-coated metal, the complete bond includes three interfaces:
- adhesive to coating;
- cohesive strength of the coating;
- coating to metal.
The tape cannot compensate for paint that is poorly bonded to the metal underneath.
When Primer Helps—and When It Does Not
Primer should not be treated as a universal solution for every difficult surface. A compatible primer performs specific functions, such as:
- binding minor loose dust and fibres;
- reducing excessive surface porosity;
- creating a more uniform bonding layer;
- improving wet-out on rough materials;
- improving adhesion under approved low-temperature conditions;
- improving adhesion to selected difficult coatings;
- reducing minor substrate variability.
Typical Primer Applications
- dusty or porous concrete;
- exterior gypsum sheathing;
- weathered OSB;
- rough masonry;
- approved cold-weather installations;
- selected low-surface-energy coatings;
- critical transitions that would be difficult to repair;
- substrates that fail the unprimed field adhesion test.
Primer Cannot Repair an Unsuitable Substrate
Primer should not be used to cover:
- standing water;
- frost or ice;
- oil contamination;
- heavy dust that should first be removed;
- loose paint;
- delaminated gypsum facer;
- rotted wood;
- unstable concrete;
- unknown chemical contamination.
Primer improves the bonding surface. It does not rebuild a structurally unsound surface.
Correct Primer Application
- Confirm that the primer is compatible with both the tape and substrate.
- Clean the surface before priming.
- Apply a thin and uniform coat.
- Avoid puddles and excessive build-up.
- Allow the primer to reach the specified dry or tack condition.
- Apply the tape within the recommended open time.
- Protect the primed area from new dust and moisture.
Applying tape too early can trap solvent or moisture. Applying it too late may allow the surface to become contaminated again.
Initial Tack Is Not Final Bond Strength
High initial tack can be useful during installation, but it is not the same as long-term adhesion or durability.
After placement, a pressure-sensitive adhesive may continue conforming to microscopic surface irregularities. The real bonded area can increase over the following hours. This is commonly called dwell-time development.
The rate of bond development depends on:
- adhesive chemistry;
- substrate temperature;
- surface texture;
- application pressure;
- substrate porosity;
- primer use;
- tape backing stiffness.
A tape that feels moderately bonded after a few minutes may become stronger after additional dwell time. Conversely, a highly tacky tape can still fail later if it is attached to dust, a weak facer or an incompatible coating.
How to Perform a Practical Field Adhesion Test
A field adhesion test is one of the most useful ways to check whether the selected tape, preparation method, primer and actual jobsite conditions are compatible.
Laboratory data cannot reproduce every field variable, including:
- the actual panel manufacturer and production lot;
- factory coatings or treatments;
- weather exposure;
- site dust and contamination;
- substrate temperature;
- primer application;
- installer technique.
Basic Field Procedure
- Select a representative area of the actual substrate.
- Prepare it using the proposed jobsite cleaning method.
- Apply a strip of flashing tape approximately 150 to 300 mm long.
- Leave a short folded tab at one end.
- Place the tape without stretching it.
- Roll it using the same tool and method intended for construction.
- Allow a defined dwell period.
- Peel the tape back slowly at approximately 180 degrees.
- Observe both peel resistance and the failure surface.
What to Record
- substrate type and manufacturer;
- surface condition and weather exposure;
- air temperature;
- substrate temperature;
- cleaning method;
- primer product and application method;
- tape product and batch;
- roller type and number of passes;
- dwell time;
- observed failure mode;
- photographs of the tape and substrate after peeling.
Compare Conditions Side by Side
For a difficult substrate, test several controlled variations:
- cleaned surface without primer;
- cleaned surface with primer;
- hand-pressed tape;
- roller-applied tape;
- current substrate temperature;
- warmer conditions where practical;
- different dwell periods;
- different tape constructions where appropriate.
This comparison can help identify whether the limiting factor is contamination, temperature, surface weakness, lack of primer, insufficient pressure or an unsuitable tape construction.
ASTM D3330/D3330M uses controlled specimen preparation, pressure, peel angle, peel speed and conditioning to measure peel adhesion of pressure-sensitive tapes. A jobsite pull check is less controlled, but it is valuable for identifying site-specific incompatibility before large-scale installation.
The field test should be performed:
- before full installation begins;
- when the substrate supplier changes;
- after prolonged weather exposure;
- when temperatures change significantly;
- when a new primer is introduced;
- when coatings or treatments are uncertain;
- after an adhesion problem is observed.
Common Symptoms, Likely Causes and Corrective Actions
| Observed Problem | Likely Causes | Recommended Action |
|---|---|---|
| Tape lifts immediately | Dust, water, low temperature, insufficient pressure or incompatible substrate. | Remove the tape, clean and dry the surface, verify temperature, prime if required and reapply with a roller. |
| Edges lift several hours later | Stored tension, insufficient edge pressure, contamination or poor wet-out. | Replace the affected area without stretching and apply additional pressure at edges and transitions. |
| Tape pulls fibres from OSB or gypsum | Weak or unstable substrate surface. | Remove loose material, use an approved primer where appropriate or replace damaged sheathing. |
| Blisters form beneath the tape | Trapped air, moisture, vapor pressure or application over an uneven surface. | Verify dryness, improve rolling technique and investigate the moisture source. |
| Center bonds but edges remain loose | Inadequate rolling, curled edges, uneven substrate or edge contamination. | Improve edge pressure and check substrate flatness and cleanliness. |
| Tape bonds to bare metal but not painted metal | Low-surface-energy coating, contamination or weak paint adhesion. | Clean, test, use an approved primer and verify coating integrity. |
| Tape works in the afternoon but not in the morning | Cold substrate or early-morning condensation. | Measure surface temperature and delay installation until the substrate is dry and within the approved range. |
| Primer does not improve adhesion | Wrong primer, excessive coating, inadequate drying or structurally weak substrate. | Verify compatibility and application instructions; repair or replace the unsuitable substrate. |
| Adhesion varies across the roll width | Uneven pressure, substrate texture or possible adhesive coating irregularity. | Repeat the test on a controlled smooth substrate and compare multiple areas and rolls. |
| Adhesive residue remains on both surfaces | Cohesive adhesive failure caused by heat, stress, movement or softening. | Review adhesive construction, loading, temperature exposure and stored tension rather than only increasing primer. |
How to Repair Flashing Tape That Has Already Lifted
Do not simply press a contaminated or weathered tape edge back into place. Once exposed adhesive has collected dust, water or construction debris, dependable rebonding may no longer be possible.
Recommended Repair Sequence
- Remove the loose tape back to a securely bonded section.
- Inspect the substrate for dust, moisture, damage or weak surface material.
- Remove adhesive residue when required and permitted.
- Clean and dry the substrate.
- Apply a compatible primer where required.
- Install a new piece of tape with sufficient overlap.
- Apply firm roller pressure over the complete repair.
- Inspect corners, edges and the water-shedding direction of all laps.
The repair should restore continuity of the flashing and water-control plane rather than merely hide the visible lifted edge.
Select the Tape for the Detail, Not Only the Adhesive Name
No single flashing tape is ideal for every substrate, climate and wall assembly.
Selection should consider:
- substrate type and surface roughness;
- required application temperature;
- expected UV and weather exposure;
- waterproofing requirement;
- vapor permeance and drying direction;
- movement capability;
- adhesive coating weight;
- backing flexibility and dimensional stability;
- compatibility with membranes, sealants and coatings;
- primer requirements;
- long-term service temperature.
For rough OSB and concrete, conformability and adhesive mass may be critical. For metal, resistance to heat and long-term ageing may be more important. For exterior gypsum, facer strength and primer compatibility may become the limiting factors.
For a broader comparison of adhesive types and control-layer functions, see How to Choose Building Envelope Tapes: Acrylic, Butyl, Vapor-Open and Vapor-Control Options.
Relevant Vantell product categories include:
- window-opening flashing tapes for sill, jamb and rough-opening transitions;
- exterior breathable flashing tapes for vapor-open exterior connections;
- interior vapor-barrier flashing tapes for interior airtightness and vapor-control continuity;
- seam and membrane sealing tapes for WRB laps, joints and membrane continuity.
Single-sided, double-sided and high-performance vapor-open tapes also serve different joint configurations. These differences are explained in the Vantell guide to single-sided, double-sided and high-performance vapor-open membrane sealing tapes.
Final Jobsite Checklist
- Is the actual substrate identified?
- Is the surface clean and structurally sound?
- Have dust, fibres, oil and chemical residue been removed?
- Is there standing water, absorbed moisture, condensation, frost or ice?
- Is the substrate temperature within the approved application range?
- Is the tape suitable for the substrate texture and detail?
- Is primer required?
- Has the primer reached the correct dry or tack condition?
- Will the tape be installed without tension?
- Have gaps and uneven joints been corrected to prevent bridging?
- Is the correct pressure roller available?
- Has a representative field adhesion test been completed?
- Have the tape batch and installation conditions been recorded?
- Are corners, overlaps and water-shedding directions correct?
Frequently Asked Questions
Can flashing tape be installed on wet OSB?
Flashing tape should not normally be installed over standing water, frost, ice or saturated OSB. Some products may tolerate slightly damp conditions, but direct contact between the adhesive and a stable wood surface is still required. Wet or swollen OSB edges should be allowed to dry, and a field adhesion test should be completed before installation continues.
When is primer required for flashing tape?
Primer may be required on dusty, porous, rough, weathered, cold or coated substrates. It is especially useful on selected exterior gypsum facers, concrete, masonry and weathered OSB. Primer selection should follow the tape manufacturer's compatibility guidance and should be confirmed with a field adhesion test.
Why do flashing tape edges lift the next day?
Delayed edge lifting is commonly caused by stored tension, insufficient edge pressure, low-temperature wet-out, contamination, substrate movement or moisture at the interface. It may also indicate that the tape was stretched around a corner or bridged across an uneven transition.
Can flashing tape be installed in cold weather?
Only when the tape is approved for the actual application temperature and the substrate is dry, free of frost and within the specified range. The substrate temperature may be lower than the surrounding air temperature, so it should be measured directly. Conditioned tape storage, primer and immediate roller pressure may also be required.
How long does flashing tape take to reach full adhesion?
Bond development depends on adhesive chemistry, temperature, substrate texture, pressure and primer use. Some tapes gain adhesion over several hours or longer. The product data and project requirements should define the appropriate dwell time before testing or loading the bond.
Does a stronger peel value always mean a better flashing tape?
No. Peel adhesion is only one performance property. A complete flashing tape must also provide suitable adhesive cohesion, backing durability, water resistance, temperature stability, movement capability, substrate compatibility and long-term ageing resistance. Different tape backings and adhesive constructions can also produce different peel behavior.
Can a field pull test replace laboratory testing?
No. A field test is useful for comparative jobsite screening, but it does not reproduce the controlled pressure, conditioning, peel speed, specimen dimensions and measurement equipment used in laboratory testing. It should supplement, not replace, standardized testing and product-specific acceptance criteria.
Conclusion
Flashing tape adhesion failures usually have an identifiable cause, but a reliable diagnosis must look beyond the visible lifted edge.
The most common causes include:
- dust and surface contamination;
- moisture, condensation or frost;
- low substrate temperature;
- weak or unstable surface layers;
- insufficient application pressure;
- stretching and stored tension;
- bridging over uneven transitions;
- incompatible tape or primer selection;
- product, storage or batch irregularities.
The most dependable approach is to treat adhesion as a complete system:
- select a tape suited to the substrate, detail and wall assembly;
- clean and stabilize the bonding surface;
- control moisture and substrate temperature;
- use primer selectively and correctly;
- install the tape without stretching or bridging;
- apply firm and uniform roller pressure;
- verify the result through documented field testing;
- investigate product consistency when field conditions do not explain the failure.
A few minutes spent preparing, testing and documenting the substrate can prevent expensive repairs after windows, cladding and interior finishes have already been installed.
Note: This article provides general technical guidance. Final product selection and installation should follow applicable building codes, project specifications, designer requirements, substrate and window manufacturer instructions, and the flashing tape manufacturer's current technical documentation.